 how-to
How to Fix Burst Pipes: Step-by-Step Guide
Table of Contents
- How to Fix Burst Pipes: Step-by-Step
- Step 1: Shut Off the Main Water Supply Valve
- Emergency Temporary Fixes: Using a Burst Pipe Repair Kit
- Making the Permanent Repair
- Checking Your Work: Pressure Testing and Leak Detection
- What Does It Cost to Repair a Burst Pipe?
- When to Call an Emergency Plumber Instead of DIY
- Preventing Future Bursts
- Frequently Asked Questions
Last Updated: September 9, 2026
How to Fix Burst Pipes: Step-by-Step
A burst pipe is one of the most stressful emergencies a homeowner can face, and knowing how to fix burst pipes quickly can mean the difference between a minor cleanup and thousands of dollars in water damage. The first few minutes matter most: your priority is stopping the flow of water, not reaching for a toolbox. This guide walks through the complete process, from the initial emergency response to the permanent repair, so you can act with confidence while protecting your home. We will cover temporary fixes, permanent fitting installation, and the critical safety steps that many DIY guides overlook.
The most important rule is simple: do not attempt any repair while water is still actively flowing through the damaged section. Water pressure makes soldering impossible and prevents most fittings from sealing properly. Once you shut off the supply and drain the line, the actual repair is a straightforward job that most homeowners with basic tools can handle. Before you start, you need to identify what kind of pipe you have, since copper, PEX, and galvanized steel each require different repair approaches.
Assess the Damage and Identify the Pipe Material
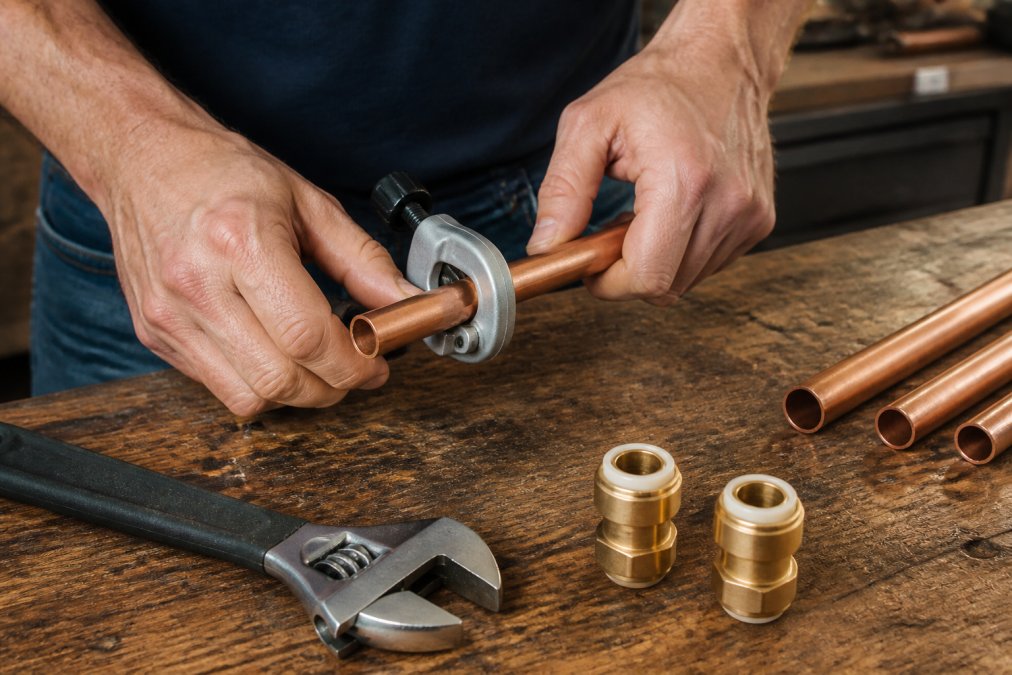
Before buying any parts, confirm what your plumbing system is made of. Pipe material identification is the step most DIY guides skip, yet it determines which repair method will work. Copper pipes are rigid, reddish-brown, and require either soldering or compression fittings. PEX tubing is flexible, often white, red, or blue, and pairs best with push-to-connect or crimp fittings. Galvanized steel is heavy, silver-gray, and magnetic, typically needing threaded couplings or a transition fitting. Look for a label printed along the pipe length, or check the pipe where it enters your water heater for the most reliable identification.
What You'll Need for the Repair
Gather everything before you shut off the water, since you will not want to leave the site once the line is open. For a permanent repair, you will need a pipe cutter or hacksaw, a deburring tool or emery cloth, and the appropriate fittings for your pipe material. Compression fittings work on copper and require only two wrenches. Push-to-connect fittings work on copper, PEX, and CPVC, and require no special tools beyond a pipe cutter and a deburring tool. You will also need a bucket, towels, a flashlight, and pipe sealant tape if you are working with threaded connections.
Step 1: Shut Off the Main Water Supply Valve
The main water shut-off valve is typically located where the water supply line enters your home, often near the water meter, in a basement, or on an exterior wall. Turn it clockwise until it stops, then open a faucet at the lowest point in your home, such as a basement sink or an outdoor spigot, to drain the remaining water from the system. This relieves pressure and prevents additional flooding while you work. If the burst is isolated to a specific fixture, like a toilet or sink, you can close the local shut-off valve instead, but shutting off the main supply is always the safer choice for a burst pipe emergency.
Emergency Temporary Fixes: Using a Burst Pipe Repair Kit
When a pipe bursts, your first priority is stopping the water. While a permanent repair requires cutting and fitting, a temporary fix can buy you critical time, especially if you cannot shut off the water immediately or if the burst is in a hard-to-reach location. These are stop-gap measures, not permanent solutions, but they can prevent hundreds of gallons of water damage while you wait for a plumber or prepare for a proper repair.
The Two Main Types of Temporary Fixes
Pipe Repair Clamps (Wrap-Around Sleeves): These are the most common and effective temporary solution. A typical kit includes a flexible rubber gasket (often EPDM or neoprene) and a two-piece metal shell that wraps around the pipe. The rubber patch is placed directly over the burst, and the metal clamps are tightened with a screwdriver or socket wrench. The pressure of the clamp forces the rubber into the crack or hole, creating a watertight seal. These clamps are available in sizes from 1/2-inch to 2-inch to fit standard copper, PEX, CPVC, and galvanized steel pipes. They are rated for typical household water pressure (40-60 psi) and can hold for days or even weeks, but they are not designed for permanent burial or long-term exposure to water pressure (hud.gov).
Epoxy Putty and Repair Tape: For pinhole leaks or small cracks, a two-part epoxy putty can be a quick fix. The putty is kneaded together and pressed firmly into the crack, where it hardens in about 15-30 minutes. For a more flexible option, self-fusing silicone tape can be stretched and wrapped tightly around the pipe. This tape bonds to itself, creating a rubber-like seal without adhesive residue. These methods are best for very small leaks where the pipe is accessible and dry. They are less reliable than a repair clamp for larger bursts or splits.
Step-by-Step: Applying a Repair Clamp
- Dry the pipe surface as much as possible. A dry surface allows the rubber gasket to seat properly. Use a rag or towel to wipe away moisture.
- Center the rubber gasket directly over the burst or crack. The gasket should extend at least 1/2 inch beyond the damaged area on all sides.
- Position the metal clamps over the rubber gasket. Ensure the bolts are aligned so you can tighten them evenly.
- Tighten the bolts gradually, alternating between them. Use a socket wrench or screwdriver to tighten until the rubber gasket visibly compresses against the pipe and the leak stops. Do not overtighten, as this can crush softer pipes like PEX or copper.
- Test the seal by slowly reopening the main water valve. Watch the clamp for any drips. If it still leaks, tighten the bolts slightly more.
When a Temporary Fix Won't Work
If the pipe has split lengthwise for more than a few inches, or if the pipe is severely corroded and crumbling, a repair clamp will not hold. In this case, your only option is to shut off the main water supply and cut out the damaged section. If you cannot stop the water flow, call an emergency plumber immediately. Also, if the burst is behind a wall or in a ceiling, do not attempt a temporary fix, you will not be able to access the pipe properly, and the water will continue to damage your home's structure. In these situations, shut off the main valve and call a professional.
Making the Permanent Repair
Once the pipe is dry and the water is off, you can make the repair that will last. The process involves cutting out the damaged section, preparing the pipe ends, and installing a new coupling or fitting. Work slowly and measure twice, since a clean, square cut is the foundation of a leak-free joint.
Cutting and Preparing the Pipe
Use a pipe cutter for copper or PEX, rotating it around the pipe and tightening gradually until the cut is complete. For galvanized steel, a hacksaw works, though it takes more effort. Cut at least two inches beyond the visible damage on each side to ensure you remove any cracked or weakened pipe. After cutting, remove the burrs from the inside and outside edges using a deburring tool or emery cloth. Rough edges will tear the O-rings on push-to-connect fittings and prevent compression fittings from sealing.
Installing a Compression or Push-to-Connect Fitting
For a compression fitting, slide the compression nut and ferrule onto the pipe, then insert the fitting body and tighten the nut with two wrenches. The ferrule compresses against the pipe to create the seal, so do not overtighten, which can crush the pipe. For a push-to-connect fitting, simply push the prepared pipe end firmly into the fitting until it clicks into place, then pull back gently to confirm it is locked. These fittings are the fastest option for DIY plumbing and require no flame, making them suitable for use near insulation or wood framing.
Checking Your Work: Pressure Testing and Leak Detection
After installing the new fitting, slowly reopen the main water shut-off valve and watch the repaired section closely for any signs of moisture. Keep the faucet open until the water flows steadily without sputtering, which indicates the air is purged from the line. Check the fitting from all angles with a dry paper towel, since even a slow drip will leave a trace. Leave the water running for several minutes and inspect the joint again. If you see any moisture, close the valve and tighten the fitting slightly, or disassemble and check the pipe ends for debris or burrs.
What Does It Cost to Repair a Burst Pipe?
The cost to repair burst pipe varies significantly based on the pipe material, the extent of the damage, and whether you hire a professional. A DIY repair using push-to-connect fittings typically costs less than fifty dollars in materials, assuming you already own a pipe cutter. Hiring a licensed plumber costs more, but includes the labor, the diagnostic work to find hidden damage, and the guarantee that the repair meets local plumbing code. For a single burst section, most homeowners find the DIY route reasonable, but the cost climbs quickly if the pipe is behind a wall or if water damaged drywall and insulation.
| Repair Approach | Materials Needed | Skill Level | Typical Outcome |
|---|---|---|---|
| Temporary repair kit | Rubber patch, clamps | Beginner | Stops leak for days, not permanent |
| Compression fitting | Fitting, two wrenches | Intermediate | Durable seal, requires careful tightening |
| Push-to-connect fitting | Fitting, pipe cutter, deburring tool | Beginner | Fast, reliable, no special tools |
| Professional repair | Varies | Expert | Code-compliant, guaranteed work |
When to Call an Emergency Plumber Instead of DIY
Some situations demand professional help, and recognizing them early prevents making the damage worse. Call an emergency plumber if the burst is inside a wall, ceiling, or under a concrete slab, since accessing the pipe requires cutting into building materials. Water damage mitigation is also a critical concern: if the leak ran for more than a few minutes, standing water may have soaked into drywall, insulation, or flooring, creating conditions for mold growth. A plumber can also pressure test the entire system to check for other weak points, which matters if you have older pipes or experienced a hard freeze. Metro Repair Plumber provides licensed, insured, and background-checked technicians who arrive with the equipment to handle complex repairs, and every job starts with a written quote before any work begins, so you will not face surprise charges.
Preventing Future Bursts
The best repair is the one you never need to make. Frozen pipes are the leading cause of bursts, so focus on insulation and temperature control before winter arrives (ready.gov). Insulate pipes in unheated areas like attics, garages, and crawl spaces, and seal any gaps where cold air can reach the plumbing. During extreme cold, let a faucet drip overnight to keep water moving through the system, and open cabinet doors under sinks to allow warm air to circulate (redcross.org). Know the location of your main water shut-off valve and test it twice a year, since a valve that seizes up is useless in an emergency. If you have had one burst, consider having a plumber inspect the rest of the system for signs of corrosion or weakness, particularly if your home has galvanized pipes, which are prone to failure after decades of service. Preventative maintenance is far less expensive than emergency repair, and it gives you peace of mind when the temperature drops.
Dealing with a burst pipe is stressful, but the process does not have to be overwhelming. Start by shutting off the water and assessing the damage, then decide whether the repair is within your skill set or requires a professional. For homeowners who prefer a guaranteed result, Metro Repair Plumber offers fast response times, transparent written quotes, and technicians who protect your floors and leave your home cleaner than they found it. Chat with us to schedule an inspection or get help with an emergency repair today.
Frequently Asked Questions
What should I do first if a pipe bursts in my home?
Your first move is to shut off the main water shut-off valve to stop the flow and limit water damage. Next, open all faucets to drain the remaining water from the plumbing system, and turn off your water heater to prevent damage. Then, assess the situation and call an emergency plumbing service if you cannot safely make the repair yourself.
How much does it cost to repair a burst pipe?
The cost to repair a burst pipe varies significantly based on the pipe material, the extent of the damage, and whether you hire a professional. While a DIY repair with a compression fitting may only cost the price of materials, professional service includes labor, which is the primary cost driver. For an exact quote, contact a licensed plumber for an assessment.
Can I use a temporary burst pipe repair kit for a permanent fix?
A temporary burst pipe repair kit, such as one with a pipe clamp and rubber gasket, is designed to stop a leak quickly in an emergency. It is not a permanent solution. These kits are meant to buy you time until a plumber can install a permanent repair with a new pipe section and proper fittings.
Why would a pipe suddenly burst?
The most common cause is freezing. When water freezes inside a pipe, it expands and creates pressure that can cause the pipe to split. Other causes include pipe corrosion, especially in older homes with galvanized steel, and excessive water pressure. Regular maintenance can help identify weak points before they fail.